How to Install Diggz Xenon on Kodi (Best Kodi Builds)
This tutorial will teach you how to installing diggz Xenon on Kodi/Firestick.
Diggz Xenon Kodi build is known chiefly for its change of interface. It comes with a variety of video add-ons that allow you to stream a variety of Movies, television documentaries, sports, shows, and other media content at no cost. To be fair, the official Kodi version is excellent.
However, the interface and available options are unknown. So, I’ve decided to change to the Diggz Xenon Kodi build as it provides a more user-friendly interface and various additional options. This build works on all Kodi platforms, including those with low-spec devices, like your FireStick.
The Xenon build is loaded with well-known add-ons such as Scrubs V2, cloud TV, and seven additional add-ons.
Compared with other Kodi versions, Diggz Xenon is specific and reasonably simple to install. The process of installation doesn’t require any additional setup or complications.
Diggz Xenon is also included in our Best Kodi Builds list.

Contents
How to Install Diggz Xenon on Kodi
Follow these given instructions to install Diggz Xenon Kodi Builds:
Step 1: Set Up Kodi to install Third Party addons
1. Start Kodi and Go to the home page of Kodi.
2. Look at the screen’s top left and hit the settings icon.
3. Now, you can see the System option.
4. Select or hover over the Add-ons title and enable Unknown source on the right.

5. Click Yes if you got any message box.
Step 2: Install Diggz Repository
6. Go back to Settings by pressing the back button on the remote.
7. Choose File Manager

8. Open Add source
9. Tap on <None> section.

11. Enter the given URL – http://diggzrepo.ddns.net
12. This is diggz xenon builds’ official source.

13. Look at the below text box called the media source name box.
14. Enter the “diggz” or any different you want to recognize this source and hit OK.

15. Again, navigate the Add-ons option from the left panel or settings.

16. Select Install from the zip file

17. Pick “diggz” or a different name you allocated the media source in the earlier step

18. Choose Install_Matrix_19_Repo zip file.
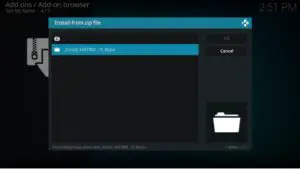
19. Now, click on repository.diggzmatrix.zip
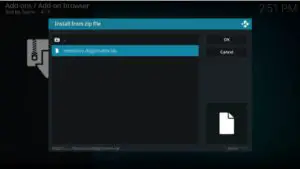
20. Stay and check the “Diggz Matrix Repository Add-on installed” notification to appear. You may have to wait for a minute.
21. Choose Install from the repository.
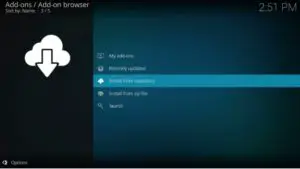
22. Open Program add-ons.
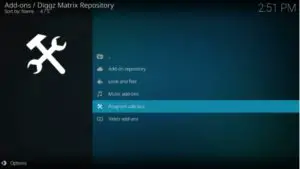
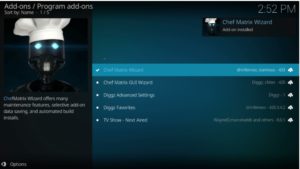
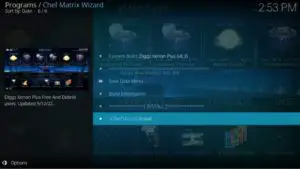
23. Hit Chef Matrix Wizard.
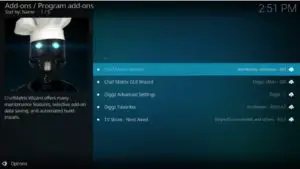
24. Select Install.
25. Now, wait for a minute “Chef Matrix Wizard Add-on installed” notification to display.
26. Press the back button until you see the home screen of Kodi.
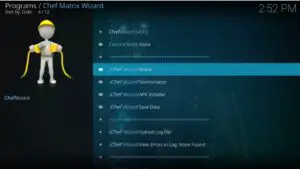
27. Go to Add-ons and open Chef Matrix Wizard
28. Choose Builds
29. Pick Diggz Xenon Plus
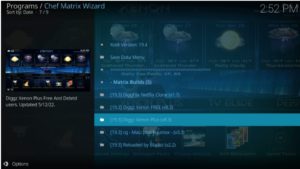
30. Now, look for the Install button.
31. Hit the Yes, Install option.
32. Build will download; wait for a minute.
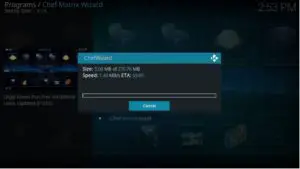
33. Tap OK
34. After successful downloading, you have to restart Kodi.
35. Now, you can open Diggz Xenon on Kodi.

Video player for google drive

Leovegas Arvostelu 2023 Mobiilikasinoiden Kuningas!