How to Install Stream Engine on Kodi
Recently many people ask us how they can install a stream engine on Kodi. Though it’s tricky nevertheless it is very easy to do, you just maintain the rules.
Nowadays steam engine is a paramount add-on on Kodi, which gives you dissimilar structures. Using steam engine on kodi you can look out your beloved movies, sport and so on.
As your answer here in this tutorial we have clarified to our students all connected to this query.
To install stream engine on Kodi, please see the step-by-step tutorial below. We recommend read the full guide thoughtfully.
So move on.
How to Install Stream Engine on Kodi
Follow the simple instruction agreed below to install the steam engine.
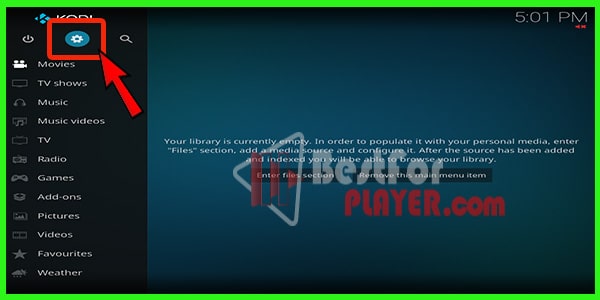
The first step is to install the Kodi on your device. The go-to the Kodi home page and click Settings.
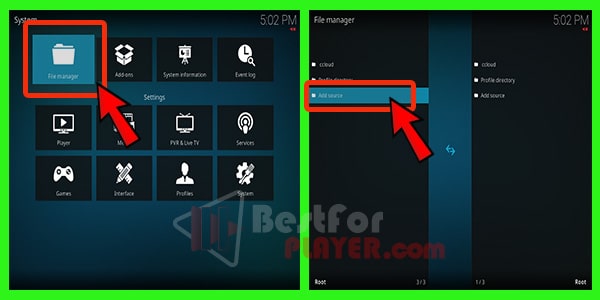
Then press File Manager and press Add Source.
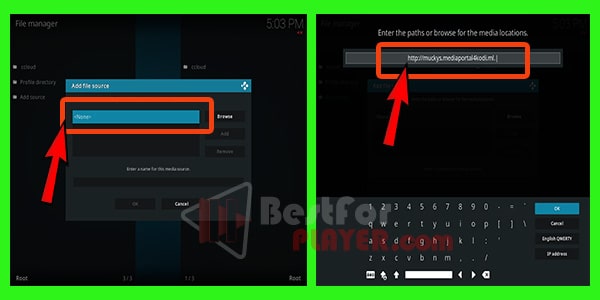
After doing this press None and write the URL: muckys.mediaportal4kodi.ml.
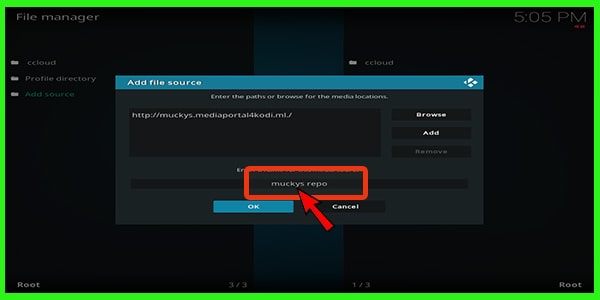
Now title this Muckys Repo.
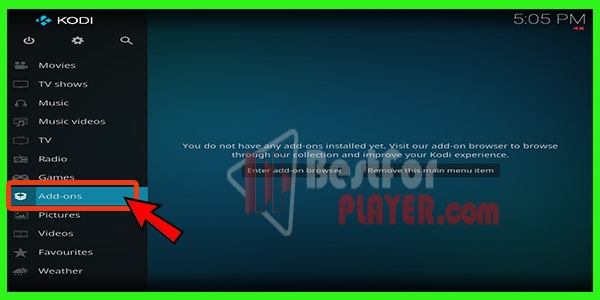
Come to the home menu and press Add-ons.
Press on Package installer sign form there.
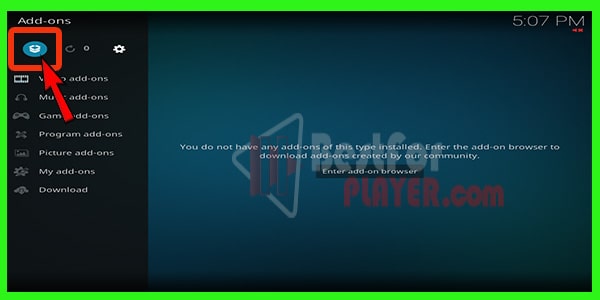
Then press on install button from zip folder choice.

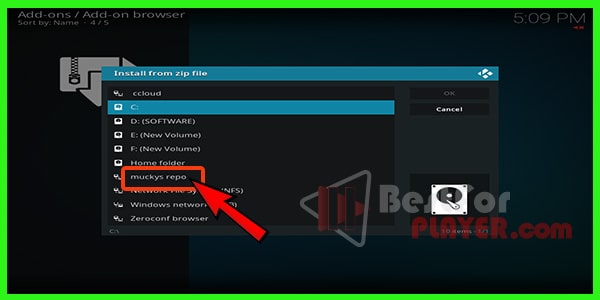
Click muckys repo.
Just wait a couple of moments and you see a new popup. Press Install from repository from the popup.
Currently, press mucky ducks repo and choice video add-ons. Lastly, press on stream engine and clack install.
Click here to know How to Watch NASCAR on Kodi?
Conclusion
I hope now you know how to install a stream engine on Kodi? After installing this addon its gives you fair less streaming power and you can see your beloved channel and more.
I optimism this tutorial helps you a lot. If you have any query about this please let us identify in the comment box.
We will answer shortly. Till then enjoy the steam engine power.

I am Bernard Damian, Founder of bestforplayer.com. I am a professional content writer, freelancer. I am a computer expert and have written articles for technology, computer and software magazines as well as websites like Techradar or PC Magazines. If you have any questions, comments, suggestions. feel free to contact us.

How to Install Steam Hub on Kodi

How to Install UFC Finest on Kodi