First, we will set up Kodi to install a third-party addon, then install SlyGuy Repository and Disney+.
Part 1: Set Up Kodi to Install Third-Party Addon (Enable Unknown Sources)
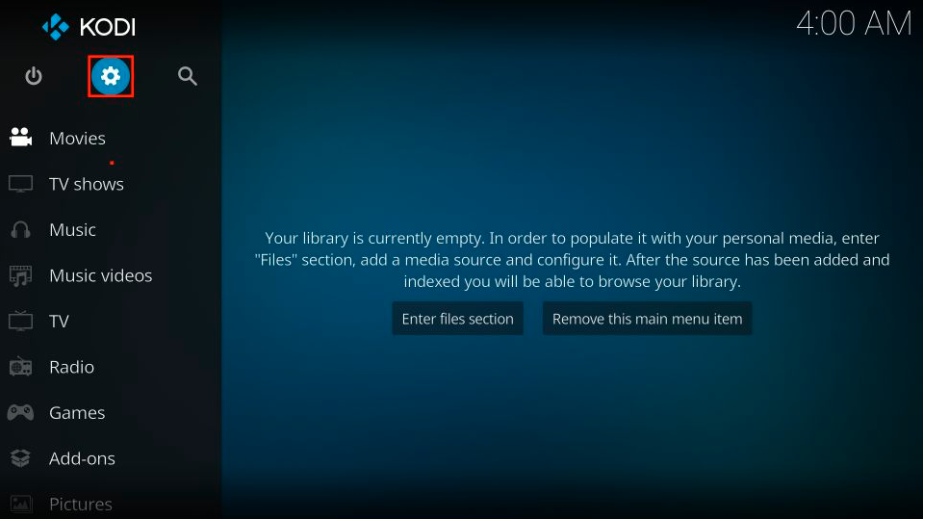
1. launch first the Kodi player. Go to the “Settings” from the home window.
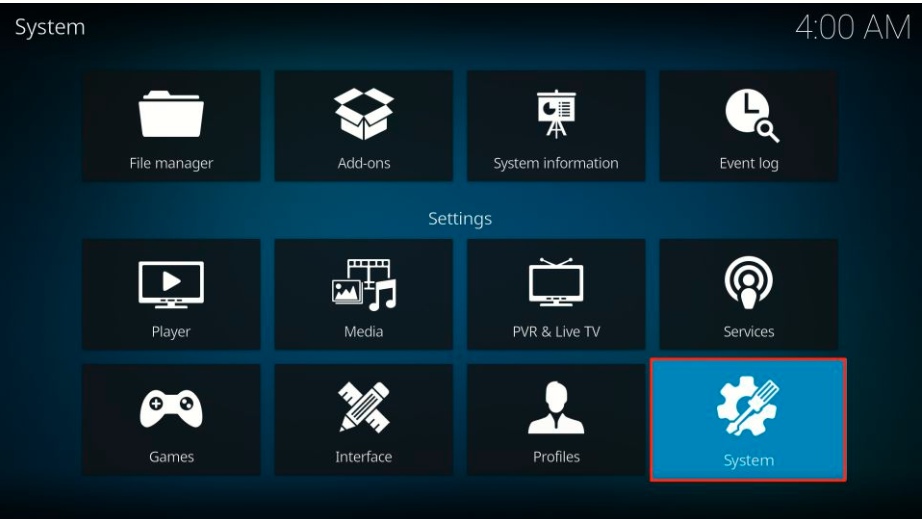
2. Hit the System option from this window.
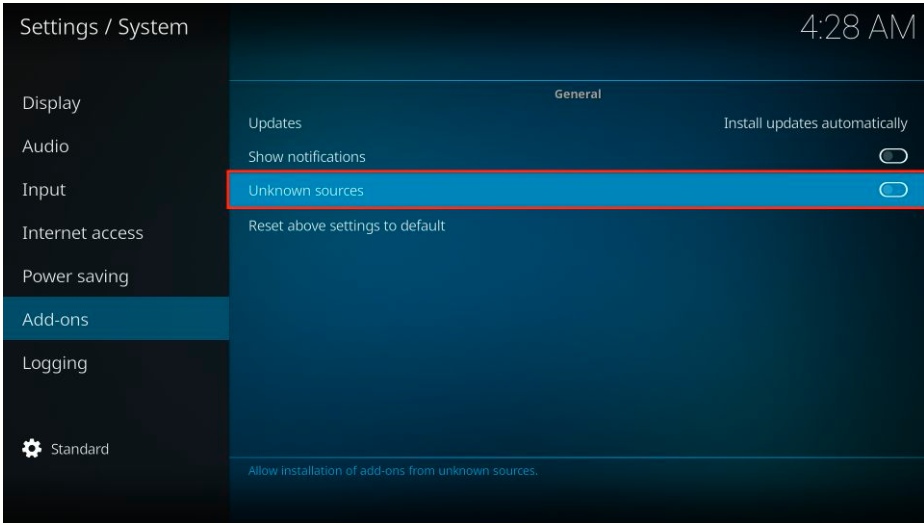
3. Now, you can see a left panel with options. Click on the Add-ons option.
4. Then, you will see the Unknown sources option disabled. Turn it ON.
5. A warning notice will pop up. You must click Yes.
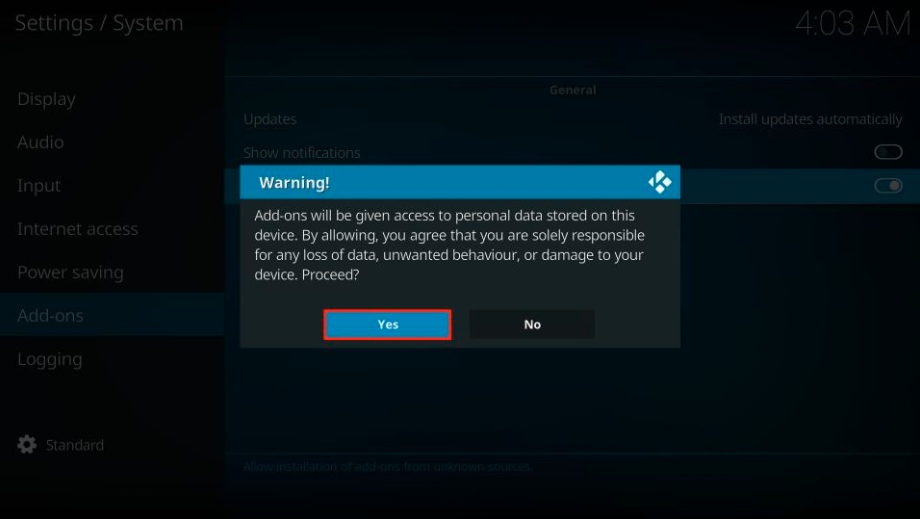
Now, Kodi media Player is ready to install third-party addons like Disney Plus.
Part 2: Install SlyGuy Repo
1. Return to the Kodi home and hit the Gear icon (Settings). Next, you’ll be able to access a The File Manager.
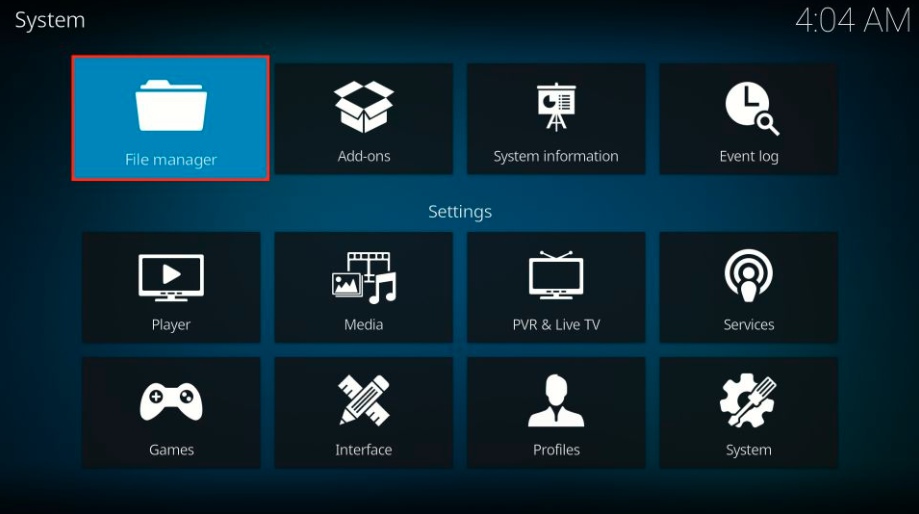
2. Now, Choose Add Source option from the right.
3. Click the section named <None>.
4. We are providing a URL: http://k.slyguy.xyz
Enter the URL carefully without making any mistakes, then click OK.
Note: bestforplayer.com doesn’t host this repository. We have just provided a link.
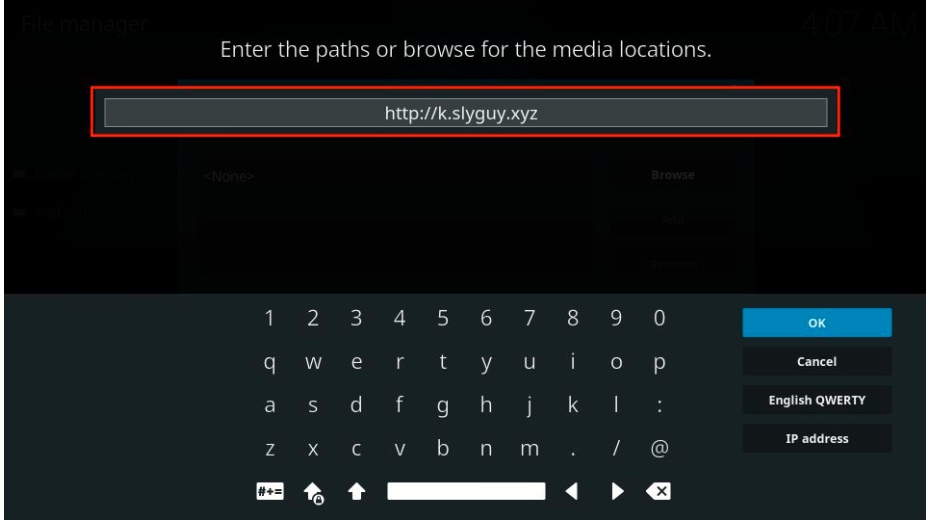
5. Choose the name area and enter the name for media sources. Enter the SlyGuy or different As your preference.
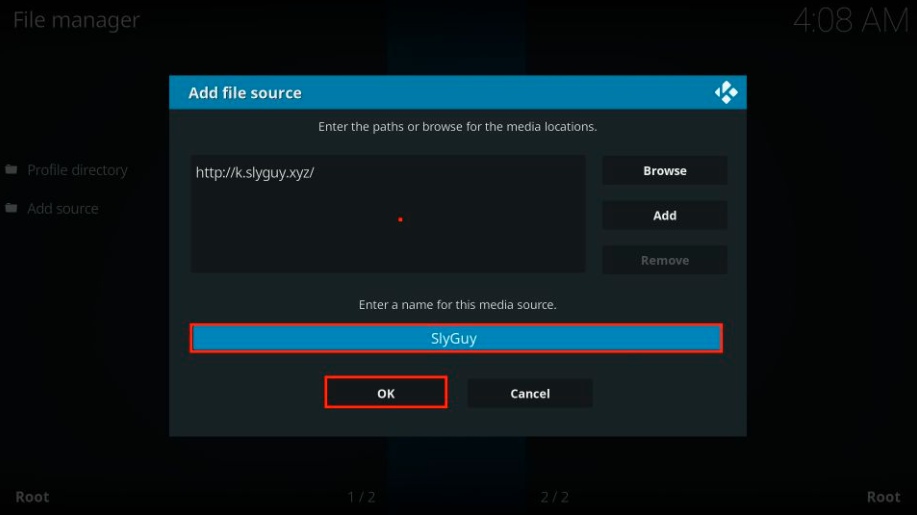
6. Again, Go to the home and click on Settings. Now, click on the Add-ons option.
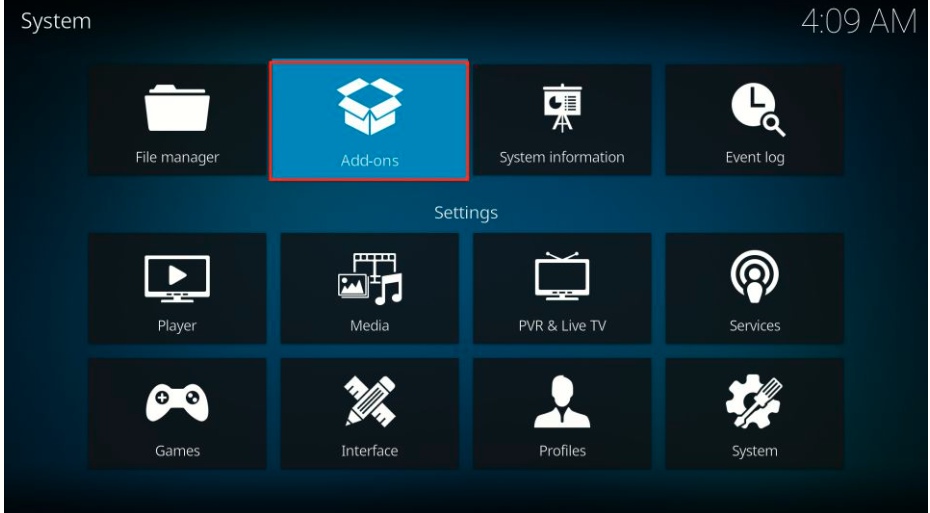
7. Choose the option named Install from zip file.
8. Select SlyGuy or the previously entered name.
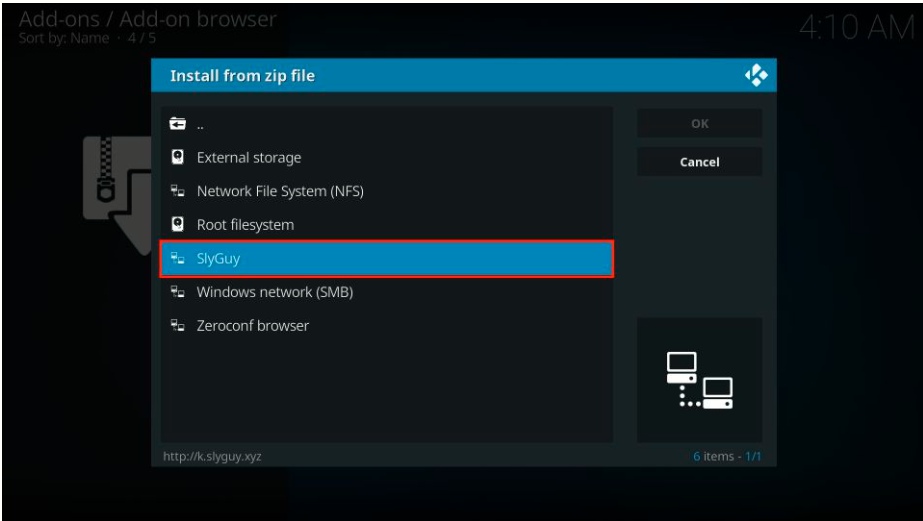
9. Choose the repository now.
10. The Repository will be up and running within seconds. When it finishes, You will get the SlyGuy Repository Add-on notification installed.
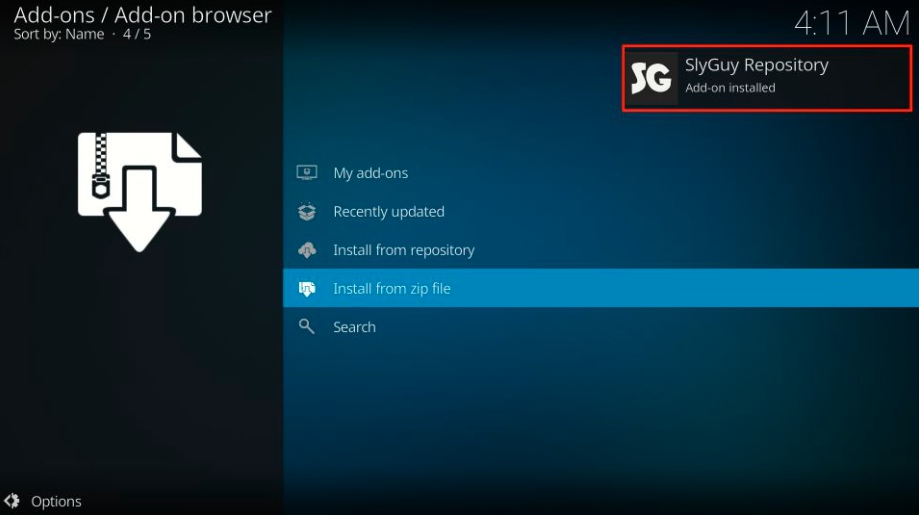
SlyGuy Repository is added on Kodi Player. Now, we only need to install Disney Plus Addon on Kodi.
Part 3: Install Disney+ on Kodi from SlyGuy Repository
1. Click the Install from the repository from the same screen.
2. Hit to SlyGuy Repository.
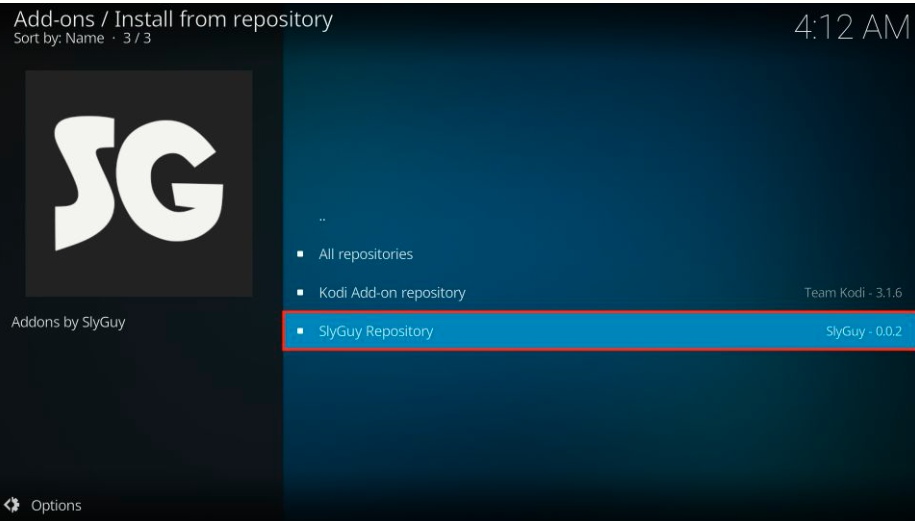
3. Navigate to Video add-ons.
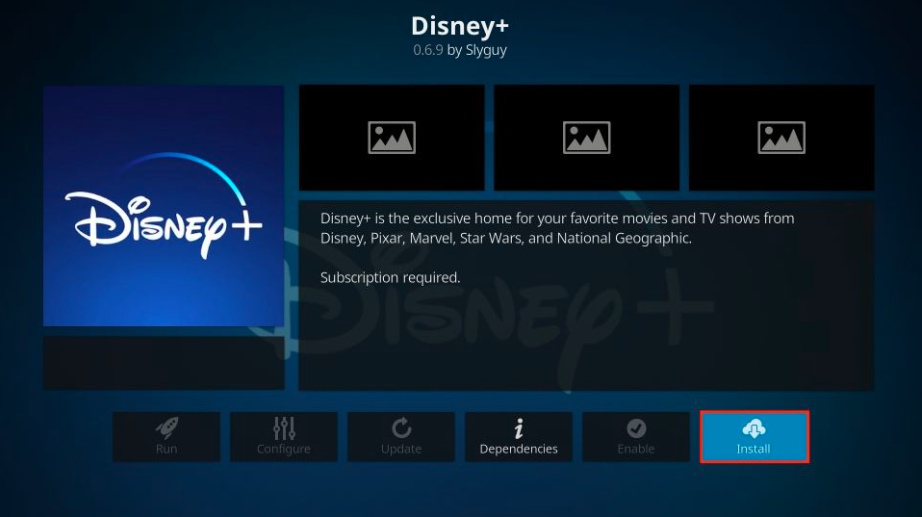
4. Pick the Disney+.
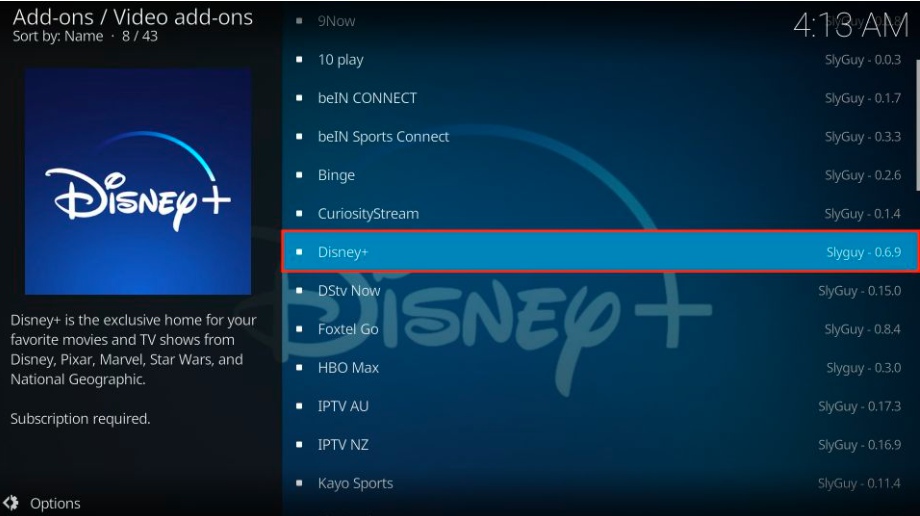
5. Click to Install button from the bottom-right corner of the screen.
6. A prompt will appears. Click OK.
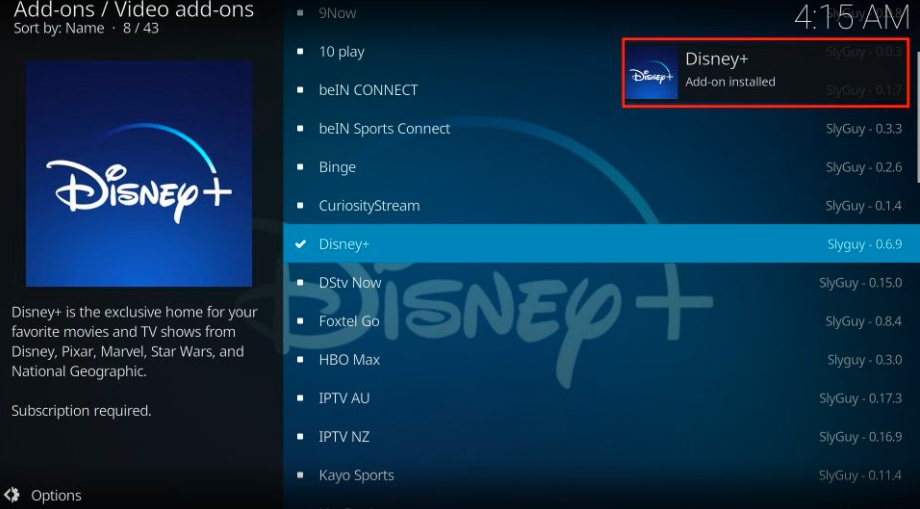
7. After a few seconds, You will get the successful installation of Disney+ Kodi Addon.
So this is the way to download Disney Plus on Kodi. Now, You can stream your preferred content on Disney Plus on Kodi.


